
Why Track My Equipment?
Enhancing efficiency and productivity on the job site will require at least some form of tracking equipment. Knowing the precise location of equipment reduces downtime and allows for prompt maintenance, minimizing malfunctions and expensive emergency repairs. Additionally, this enables cost control, efficient equipment allocation, and the ability to make well-informed decisions on equipment rental or purchases .
Equipment tracking may also improves security by preventing theft and facilitating a speedy recovery in the event that it does happen. It promotes precise job costing and billing, guarantees adherence to rules, and builds client trust through clear reporting. Equipment data analysis can also yield insights for ongoing project improvements, enhancing the competitiveness and performance of businesses.
In this blog, we’ll show you how you can track the equipment you use for your services within the ServiceWorks software.
Step 1: Create A Product Family & Product Detail For Your Equipment
To properly track your equipment, you will need to create them as serialized items within your inventory. Before you can create a serialized item, however, you must first ensure that there are both a Product Family and Product Detail within your system’s settings to assign it to.
For this specific process, we strongly recommend creating a special product family and detail within your existing product family list to assign your rental equipment to. This will both alleviate any confusion between these and your sales items, as well as give you an easier way to add them via the Job Edit menu.
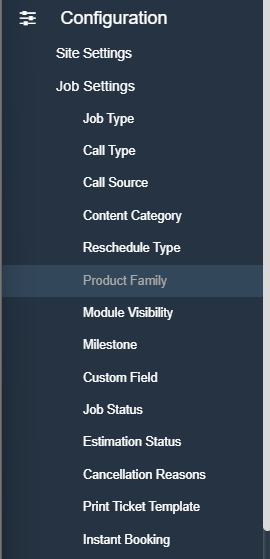
To begin, open the Configuration Tab using the cogwheel on the toolbar and navigate to Configuration -> Job Settings -> Product Family
Next, in the Product Family menu, click the New Product Family button in the upper right hand corner

In the following popup menu, name your new product family. We recommend something easily distinguishable from the rest of your items, such as Rental Equipment. Once finished, click Save to continue.

Now that you’ve created your new product family, you’ll need to add the product details. Click on the newly created product family within list and then click Add to create a product detail. For the detail name, we recommend using the name of the type of equipment being rented.

Once you’ve entered a detail name, you’re ready to create the item within your inventory
Step 2: Create Equipment As Serialized Inventory Item
Now you’ll need to enter your rental equipment as a serialized item. The reason for this is that with serialization, you can track the current locations of each individual item, whether they are on a truck, at a current service location, or even in a warehouse ready for use.
To begin this process, hover over the Inventory tab in the toolbar and click on Item

In the inventory item view, click New

Now enter in the information for your rental equipment in the Edit Item page. Make sure to have the item marked as Serialized and to have it mapped to your special Product Family and Product Detail.

Be sure to set the price of the item as 0.00 as well, the click Save to continue

WARNING: If you do not click the Serialized checkbox BEFORE saving, this item will not save as a serialized item, and this process will not work. If this occurs, you will need to delete the item from your inventory and start Step 2 over again.
Now that the equipment item is created in your inventory, you’ll need to assign a serial number for tracking. To do so, click on the Location/Quantity tab in the Edit Inventory Item menu

Next, click on the Adjust Quantity link on next to the location of your choice

In the following popup menu, use the Serial field to add a serial number and then click the +Add link. These can be the actual serial number for the equipment, or another number for your personal ease of use.

Repeat this process for all quantities of this item and click Done when finished.

Now your rental equipment is in the system and ready to be added to jobs!
Step 3: Adding Equipment To Jobs
Now that you’ve set up the equipment, you can add it to invoice tickets.
Within the Item/Part Section, enter either the item number or name of the equipment to add it to the job.
Be sure to make sure the Location field is set to where the items are currently held; otherwise, you WILL NOT be able to assign serial numbers to track the item’s location.

Click Save and then return to the item section of the invoice. Click the dropdown box under the Qty/Serial column and assign one of the created serial numbers to the item

Then change the item’s disposition to Keep on Ticket. Doing so will assign the item to the invoice ticket and remove the selected quantity from your inventory, creating a tracking log linked directly to this ticket.

Once finished, click Save to assign the rental equipment to this job.
Step 4: Returning Equipment After Use
Once a job with equipment is completed, you’ll want to return that equipment to your inventory. You can do so, by navigating to the completed invoice the equipment is assigned to and changing the disposition from “Keep On Ticket” to “Return To Shop“. This will return the item back into your inventory for further use, as well as keep track that the rented equipment was used on this invoice

Step 5: Tracking Your Equipment
Either while being rented or once returned, you can use the inventory search to see where your item currently is and its history.
To do so, return to the inventory item search menu.
In the search bar, click the Serialized checkbox and add the product family and details for your equipment item, then click Search

In the item menu, click edit on the three dots at the end of your serialized equipment item

Then click on the History tab in the next window to view the item’s current history

This can also be accomplished using the Serial Number Search, Serial Numbers Available, and Serialized Items Sold reports.
Need More Assistance?
Contact us:
Use the chat bubble on our site here
Email: support@service.works
Phone: 636-220-4363 Ext #1