
Need more organization options within your inventory? Here’s a tutorial on how to set up inventory bins within the ServiceWorks software
Method 1: Adding / Editing Bins in Inventory Settings
For this method, you’ll need to access the location settings within ServiceWorks. To do so, navigate to Configuration -> Inventory Settings -> Location to begin adding bins into ServiceWorks
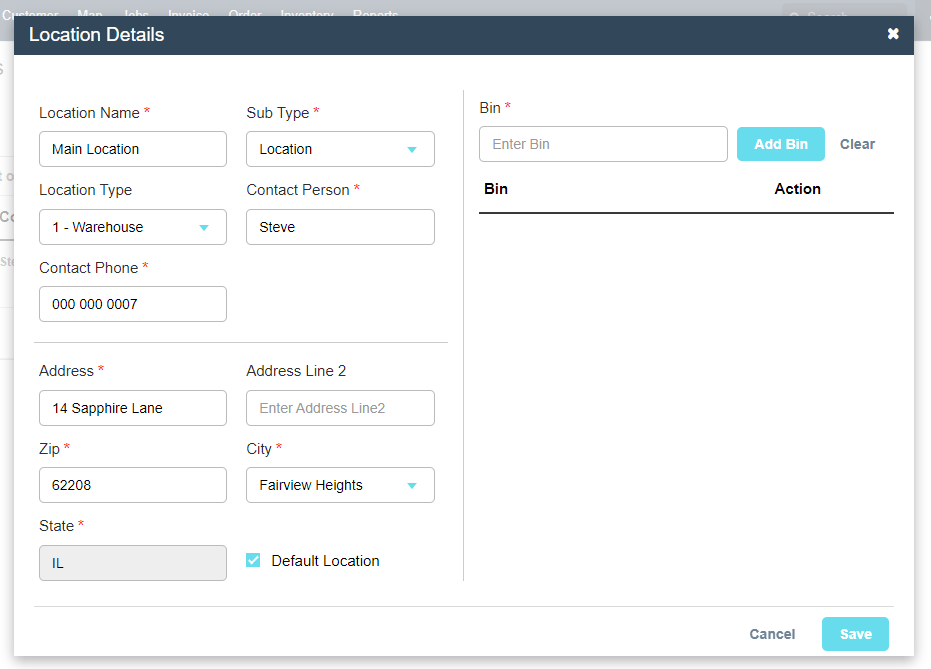
Click the edit icon on an existing location or create one using the New Location button in the top right to access the Location Details menu

Now that you’ve reached the menu, you can use the right portion to create, delete, and edit your bin locations. Once you’ve named your bins, select Save to confirm the changes.
Method 2: Inventory Edit Menu
You can also add and edit bins from the inventory edit menu as well. Hover over Inventory in the toolbar and select Item from the dropdown menu

Once in the item menu , hover over the three dots at the end of an item and select Edit from the dropdown box

Once in the edit menu, click on the Location/Quantity tab to access a list of your current locations.

You can click on the Adjust Quantity link next to the location, bringing up a popup menu where you can create the bins as well as add items into that bin. Be sure to click Save before exiting the menu.

Or instead, you can click the + button next to the location to expand a bin entry field. In the field provided, you can enter the name of your bins and click Add Bin to create and save the new bin to the location.

Need More Assistance?
Contact us:
Use the chat bubble on our site here
Email: support@service.works
Phone: 636-220-4363 Ext #1