
Online appointment scheduling is now more powerful in ServiceWorks. You can create multiple booking page for your services and brand it with your own colors and graphics.
Setting up your Page
Go To Settings -> Job Settings -> Instant Booking
Click Add New Button to start designing a new page. There are multiple sections for your page that you will find in the horizontal menu.

Page
- Enter Page Name. Each page name has to be unique.
- Enter JavaScript for chat or google analytics. Make sure to copy the correct JavaScript and paste it in this box.
- You can chose whether to display your company email, phone or address in the booking page by checking the appropriate checkbox.

Brand
Chose your brand colors and logo in this section. You can chose three brand colors. Primary, secondary and teriary.

Banner
Set your banner for the page. You can add a text message as your brand message in here that will come over your banner. This is a optional section. You can skip this if you don’t want to display banner.

What We Do
In this section you can add details about your services along with graphics.

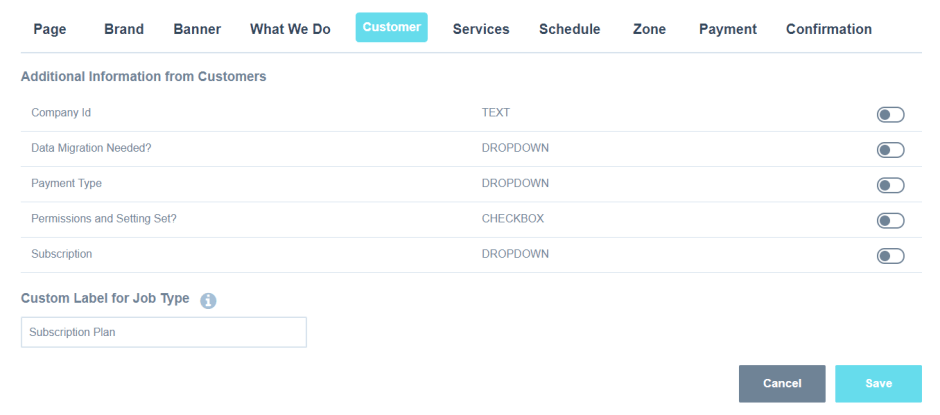
Customer
In this section you can configure additional fields for customer that you want to collect information on. Additionally you can set a custom label for the built-in field called Job Type.
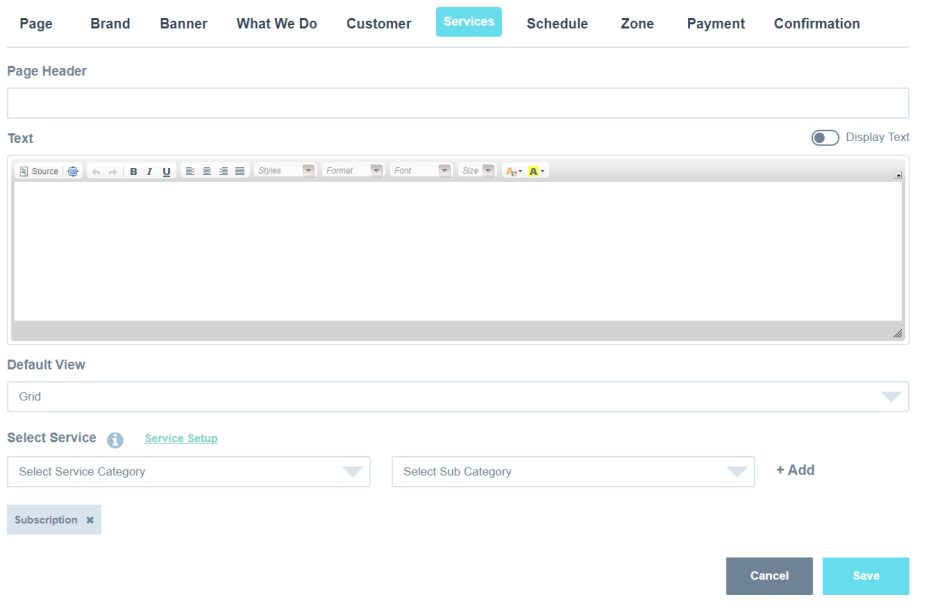
Services
This is the place where you can customize the services. You can select multiple services, make sure those are turned on for online display.
Schedule
In this section you can display your booking slots. There are three options to choose from.
- Show all slots as available: In this scenario all the slots will be shown even if they are booked. This helps to get customer information first, so that you can coordinate the exact time later.
- Show available slots only: Rest will be shown as booked. If you have 4 tech and 3 slots then in reality unless 4 X 3 = 12 slots are booked the slots will be available
- Do Not display any slots: In this situation you need to choose a schedule date, so that when the booking is made it shows up in your schedule calendar.

Zone
Firstly, you can display your zone map, by uploading an image. Draw your zone map in google and then save it as image to upload in Service Works. Set zone restriction to restrict customers outside your defined zone from booking.

Payment
In this section you can choose to collect payment or not for your booking.

Confirmation
After the booking you can set up where do you want to send your customers. You can redirect back to your site or anywhere you chose to. If you are redirecting to your page, you can easily track for conversion.

Share your Online Appointment Scheduling Page
Share your online booking page URL with your customers in emails, texts, brochures, social media. Add “Book Now” button on your Facebook, Instagram and Google My Business pages.